こんばんは!
すごく久しぶりに記事を投稿!
と言っても、備忘録用に記事を書くのですごく短いです。
Swift3でのプッシュ通知する際に、必要となるトークン発行のコードが、Swiftのバージョンと友に変更されていっており、ググった際にいろんなコードの記事が出てきたので、自分の備忘録用に書きます。
証明書は割愛!
プッシュ通知に必要となる証明書関係の作成の仕方は従来のやり方で問題なかったので割愛です!ヽ(´ー`)ノ
プッシュ通知の確認ダイアログ表示
この処理のソースが、Swiftのバージョンによったり、iOSのバージョンによって書き方が変わってしまっていたので、とりあえず今(2017/08/31)のバージョンの書き方をメモです。
AppDelegate.swift

import UserNotifications

func application(_ application: UIApplication, didFinishLaunchingWithOptions launchOptions: [UIApplicationLaunchOptionsKey: Any]?) -> Bool {
  let center = UNUserNotificationCenter.current()
  center.requestAuthorization(options: [.alert, .badge, .sound], completionHandler: {granted, error in
    if error != nil {
      return
    }
    if granted {
      UIApplication.shared.registerForRemoteNotifications()
    }
  })
  return true
}

func application(_ application: UIApplication, didRegisterForRemoteNotificationsWithDeviceToken deviceToken: Data) {
  print(deviceToken)
}
AppDelegate.swiftファイルに『import UserNotifications』を記述して、『application:didFinishLaunchingWithOptions:』関数内にプッシュ通知を要求する部分を記述。
新しく『application:didRegisterForRemoteNotificationsWithDeviceToken:』関数を記述して、トークンを取得した際の処理を追加。
最後に!

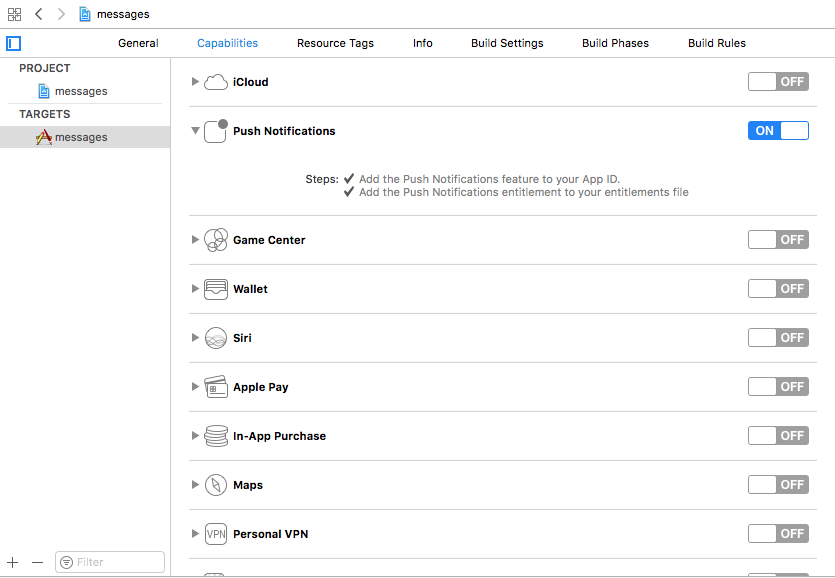
『Target > Capabilities』の『Push Notifications』が『ON』になっているか確認!
地味にここで、少し躓いてしまった…(汗)
とりあえず、これでアプリを実機にインストールしたらプッシュ通知の確認ダイアログが表示されたので良し!